📘
TaikoHub - Dactyl Manuform User Guide
Home
Version: 2024-05-01
Version: 2024-05-01
  • 1. Introduction
  • 2. About Your Keyboard
  • 3. Customizing Keyboard Layout for Windows and Mac with QMK
  • 4. Customizing Keyboard Layout for Linux with QMK
  • 5. Customizing Keyboard Layout with ZMK
  • 6. Hot Swapping Keyswitches
  • 7. Swapping Microcontrollers
    • 7.1 Swapping Microcontrollers: Bluetooth
  • 8. Troubleshooting
    • 8.1 Troubleshooting: QMK Toolbox
  • 9. Terminology
  • 10. Changelog
  • 11. Hardware Issues Tracking
Powered by GitBook
On this page
  • 5.1 🌀ZMK Firmware
  • 5.2 📶Adding Bluetooth Functionality: Default Keyboard Layout
  • 5.3 📶Adding Bluetooth Functionality: Custom Keyboard Layout

5. Customizing Keyboard Layout with ZMK

How to flash wireless bluetooth dactyl manuform with ZMK

Previous4. Customizing Keyboard Layout for Linux with QMKNext6. Hot Swapping Keyswitches

Last updated 29 days ago

5.1 🌀ZMK Firmware

Firmware: Firmware is software installed on microcontrollers to make your keyboard work.

ZMK Firmware: ZMK firmware is also known as just ZMK. It is a keyboard firmware similar to QMK, which is what your keyboard initially came with. ZMK and QMK are nearly identical for most users. The main difference being: If you want Bluetooth, use ZMK. If you want wired, use QMK.

Swap in bluetooth compatible microcontrollers before following this section. See 7.1 Swapping Microcontrollers: Bluetooth before continuing below. Bluetooth compatible microcontrollers include nice!nano, Pro Micro nRF52840, SuperMini nRF52840 BLE, among many others.

5.2 📶Adding Bluetooth Functionality: Default Keyboard Layout
  • This adds the default QWERTY layout seen in the 1. Introduction.

  • This process takes about 10 minutes.

  1. Download the firmware zip file for your keyboard below.

  1. Extract the zip file. You'll see 3 files. You'll use these files later.

    1. settings_reset-nice_nano_v2-zmk.uf2

    2. dactyl_manuform_5x6_left-nice_nano_v2-zmk.uf2

    3. dactyl_manuform_5x6_right-nice_nano_v2-zmk.uf2

  2. Plug the left piece of the keyboard to the computer. Make sure the two keyboard pieces are not connected to one another.

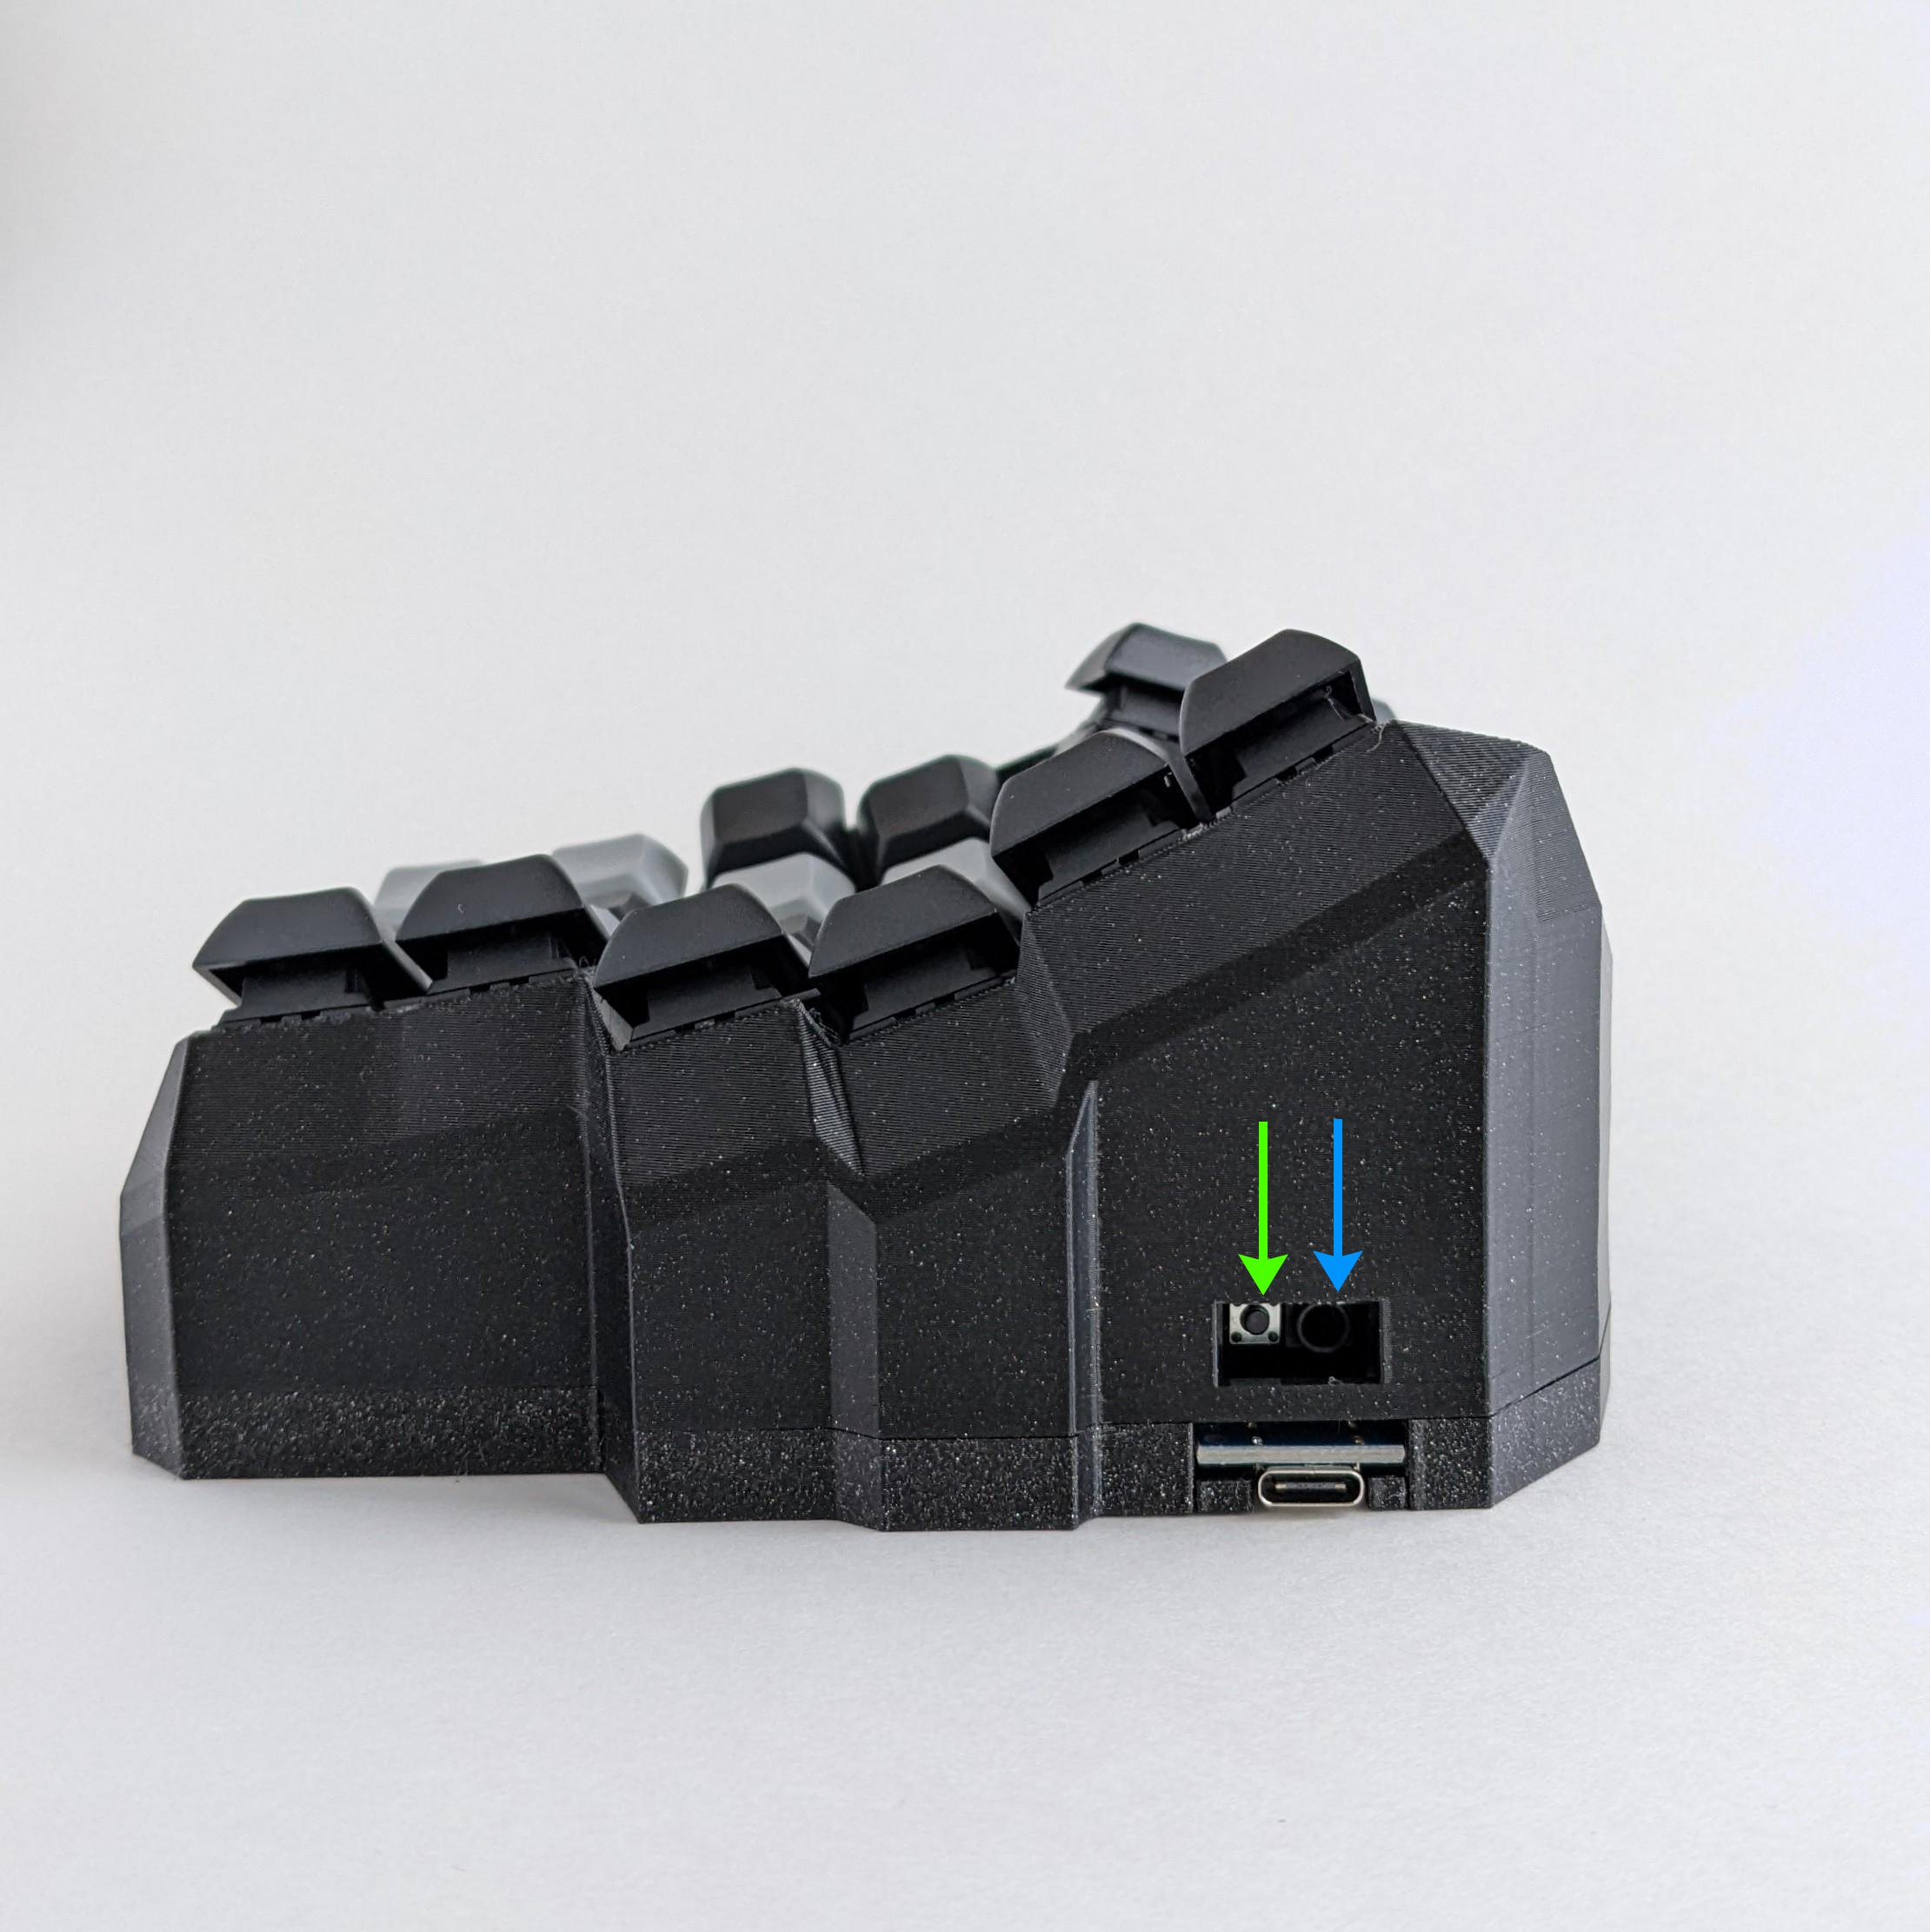
  3. Click the reset switch twice. The reset switch is shown in the image below.

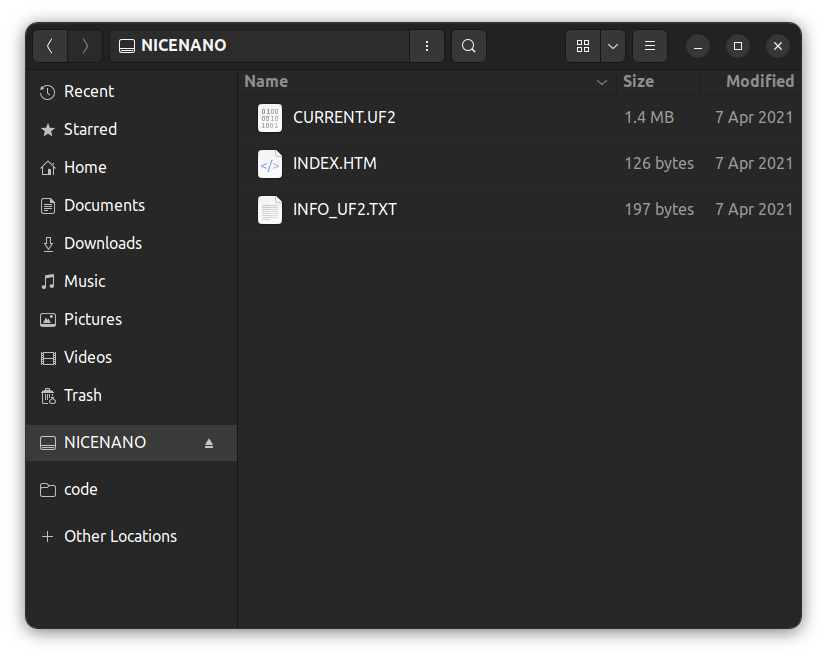
  1. You should see that your computer has detected a new USB device called NICE!NANO. Open this in file explorer. Ignore the files that are in there.

  1. Drag the settings_reset-nice_nano_v2-zmk.uf2 file into file explorer. After a few seconds, the USB device should disconnect itself. A pop up notification may show up saying "Error while copying "dactyl_manuform_5x6_left-nice_nano_v2-zmk.uf2". This is not an actual error.

  1. Click the reset switch twice again.

  2. Open up the USB device again.

  3. Drag the dactyl_manuform_5x6_left-nice_nano_v2-zmk.uf2 file into the file explorer.

  4. Repeat the above steps for the right side of the keyboard. Use dactyl_manuform_5x6_right-nice_nano_v2-zmk.uf2 for the last step.

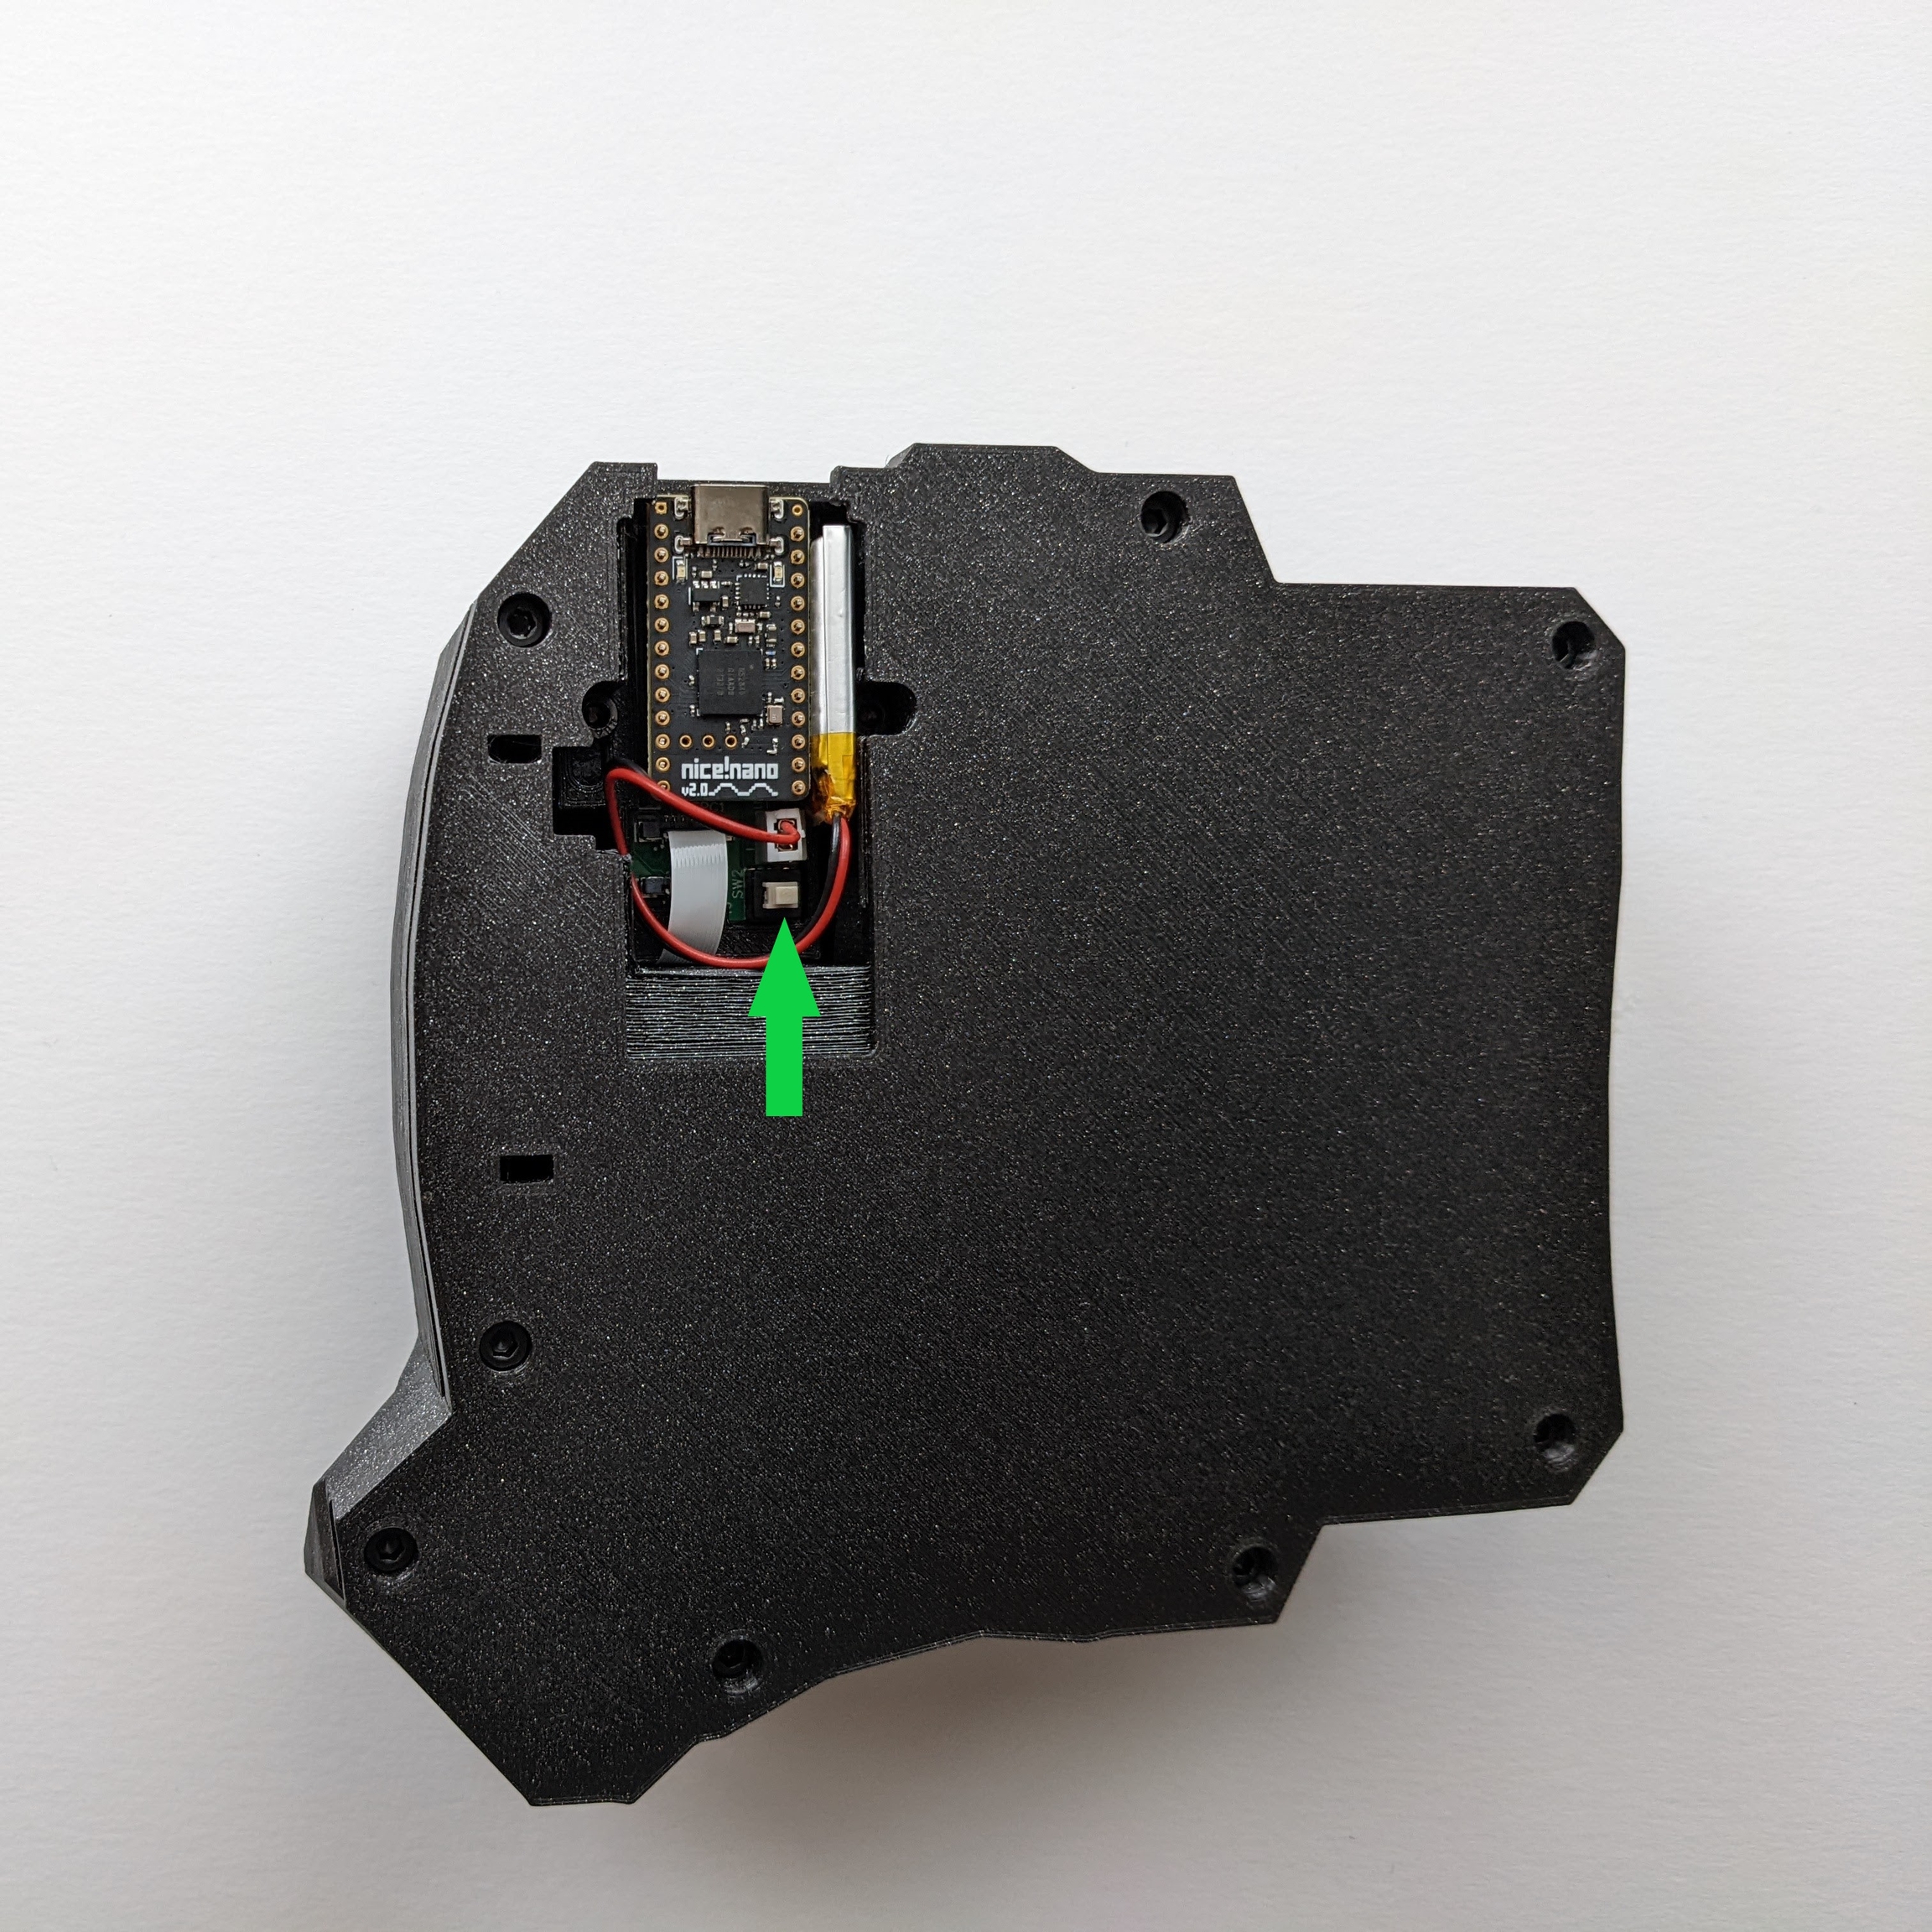
  5. Charge the battery for each keyboard by separately connecting each piece to the computer. Then make sure the on/off switch is not pressed down. The keyboard is ON when the switch is not pressed down. The keyboard is OFF when the switch is pressed down.

  1. If you are using the default 110mAh battery that came with the keyboard, it will take about 1 hour to fully charge the keyboards. This will last 1 - 2 weeks for the left side of the keyboard, and 3 months for the right side of the keyboard. The reason the left side of the keyboard has a shorter battery life is because it needs to maintain two Bluetooth connections concurrently, one with the computer and another with the right piece of the keyboard.

  2. Once you are done charging, test the keyboard by turning on Bluetooth on your computer. You should see a Bluetooth device called TAIKO-DACTYL-L. Connect to the device and it should start working. You will not see TAIKO-DACTY-R because the left piece of the keyboard connects to the right piece automatically.

5.3 📶Adding Bluetooth Functionality: Custom Keyboard Layout

  • This adds your own custom keymap.

  • It uses the ZMK CLI tool.

  • This process may take 30 minutes or longer depending on how familiar you are with programming.

  1. Clone the forked repository to your local machine.

# replace yourusername with your Github username
git clone https://github.com/yourusername/zmk-config.git
  1. Git checkout the branch that matches your keyboard size.

# Size large (6 keyed-thumb cluster)
git checkout large

# Size medium (5 keyed-thumb cluster)
git checkout medium

# Size small (3 keyed-thumb cluster)
git checkout small
  1. Open the config/dactyl_manuform_5x6.keymap to edit the keyboard layout.

cd zmk-config

# Use your preferred code editor to open the file
code config/dactyl_manuform_5x6.keymap
  1. Once you are done, commit and push the change.

git commit -m "Update keymap"
git push
  1. Go to your Github repo and check the Actions tab. You should see a new workflow run. Once the workflow is complete, you should see a new firmware file in the "Artifacts" section. Download the firmware.zip file.

  2. Extract the firmware.zip file. You'll see 3 files. You'll use these files later.

    1. settings_reset-nice_nano_v2-zmk.uf2

    2. dactyl_manuform_5x6_left-nice_nano_v2-zmk.uf2

    3. dactyl_manuform_5x6_right-nice_nano_v2-zmk.uf2

  3. Plug the left piece of the keyboard to the computer. Make sure the two keyboard pieces are not connected to one another.

  4. Click the reset switch twice. The reset switch is shown in the image below.

  1. You should see that your computer has detected a new USB device called NICE!NANO. Open this in file explorer. Ignore the files that are in there.

  1. Drag the settings_reset-nice_nano_v2-zmk.uf2 file into file explorer. After a few seconds, the USB device should disconnect itself. A pop up notification may show up saying "Error while copying "dactyl_manuform_5x6_left-nice_nano_v2-zmk.uf2". This is not an actual error.

  1. Click the reset switch twice again.

  2. Open up the USB device again.

  3. Drag the dactyl_manuform_5x6_left-nice_nano_v2-zmk.uf2 file into the file explorer.

  4. Repeat the above steps for the right side of the keyboard. Use dactyl_manuform_5x6_right-nice_nano_v2-zmk.uf2 for the last step.

  5. Charge the battery for each keyboard by separately connecting each piece to the computer. Then make sure the on/off switch is not pressed down. The keyboard is ON when the switch is not pressed down. The keyboard is OFF when the switch is pressed down.

  1. If you are using the default 110mAh battery that came with the keyboard, it will take about 1 hour to fully charge the keyboards. This will last 1 - 2 weeks for the left side of the keyboard, and 3 months for the right side of the keyboard. The reason the left side of the keyboard has a shorter battery life is because it needs to maintain two Bluetooth connections concurrently, one with the computer and another with the right piece of the keyboard.

  2. Once you are done charging, test the keyboard by turning on Bluetooth on your computer. You should see a Bluetooth device called TAIKO-DACTYL-L. Connect to the device and it should start working. You will not see TAIKO-DACTY-R because the left piece of the keyboard connects to the right piece automatically.

Navigate to and fork the repository.

https://github.com/taikohub/zmk-config
317KB
size_large_firmware.zip
archive
Zip file that contains firmware files for the size large keyboard
317KB
size_medium_firmware.zip
archive
Zip file that contains firmware files for the size medium keyboard
317KB
size_small_firmware.zip
archive
Zip file that contains firmware files for the size small keyboard
Figure 5.1 The green arrow indicates the reset switch. The blue arrow indicates the socket connecting the two pieces of the keyboard.
Figure 5.2 You should see NICE!NANO show up as a USB device.
Figure 5.3 This prompt is not an error.
Figure 5.4 The green arrow points to the on/off switch.
Figure 5.5 The red arrow shows the OFF position. The switch is pressed down. The green arrow shows the ON position. The switch is not pressed down.
Dactyl Manuform ZMK Tutorial - Adding a battery
Dactyl Manuform ZMK Tutorial for Customizing Keyboard Layout
Dactyl Manuform ZMK Tutorial - Error while copying dactyl manuform
Dactyl Manuform ZMK Tutorial for Customizing Keyboard Layout
Dactyl Manuform ZMK Tutorial - Adding a battery
Dactyl Manuform ZMK Tutorial - Error while copying dactyl manuform